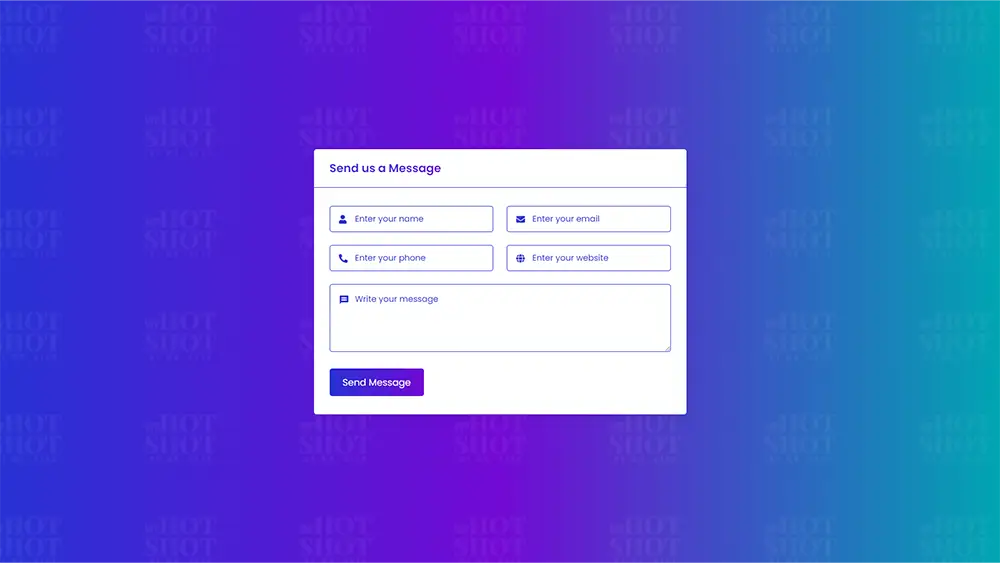
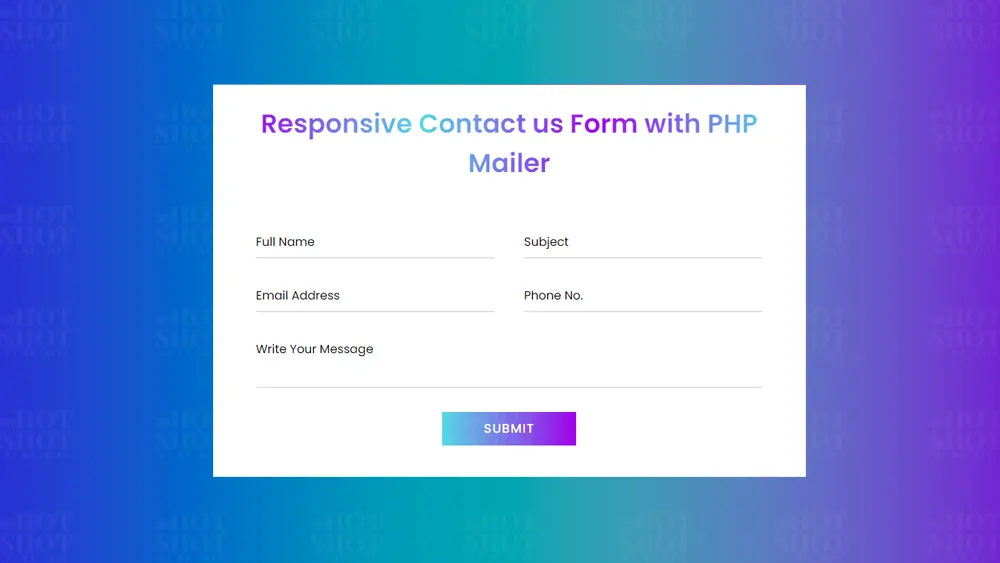
In today’s digital world, having a website is a necessity for any business, big or small. A website not only provides your customers with information about your products or services, but it also serves as a platform for communication. And when it comes to communication, a contact form is a vital element of your website. In this blog, we’ll explore the importance of a contact form on a website, the role of PHP in creating one, and how to create a working contact form in PHP.
Importance of Contact Form on a Website
A contact form is a simple web-based interface that allows users to communicate with the website owner or administrator. It’s a direct way for your website visitors to contact you without the need for email or phone calls. Contact forms have become a standard feature on websites because they’re easy to use and provide a level of privacy that many users prefer.
The primary purpose of a contact form is to provide your visitors with a way to ask questions, submit feedback, or make inquiries about your products or services. This direct communication channel helps build trust and credibility with your customers, which is essential for building a strong brand. A contact form also enables you to capture important user data such as name, email address, and phone number, which you can use for future marketing or follow-up purposes.
Overall, a contact form is a necessary component of any website. It provides a simple and convenient way for users to communicate with you and helps you build a stronger relationship with your customers.
The Role of PHP in Creating a Contact Form
Creating a Working Contact Form in PHP
Creating a contact form in PHP involves several steps. Here’s a step-by-step guide to help you create a working contact form in PHP:
Creating a HTML file
First, create an HTML file with the name of index.html and paste the given codes into your HTML file. Remember, you’ve to create a file with .html extension.
					<!DOCTYPE html>
<!-- Coding By WPHotShot - www.WPHotShot.com -->
<html lang="en">
<head>
  <meta charset="UTF-8">
  <meta name="viewport" content="width=device-width, initial-scale=1.0">
  <title>Contact Form in PHP | WPHotShot</title>
  <link rel="stylesheet" href="style.css">
  <link rel="stylesheet" href="https://fonts.googleapis.com/icon?family=Material+Icons">
  <link rel="stylesheet" href="https://cdnjs.cloudflare.com/ajax/libs/font-awesome/5.15.3/css/all.min.css"/>
</head>
<body>
  <div class="wrapper">
    <header>Send us a Message</header>
    <form action="#">
      <div class="dbl-field">
        <div class="field">
          <input type="text" name="name" placeholder="Enter your name">
          <i class='fas fa-user'></i>
        </div>
        <div class="field">
          <input type="text" name="email" placeholder="Enter your email">
          <i class='fas fa-envelope'></i>
        </div>
      </div>
      <div class="dbl-field">
        <div class="field">
          <input type="text" name="phone" placeholder="Enter your phone">
          <i class='fas fa-phone-alt'></i>
        </div>
        <div class="field">
          <input type="text" name="website" placeholder="Enter your website">
          <i class='fas fa-globe'></i>
        </div>
      </div>
      <div class="message">
        <textarea placeholder="Write your message" name="message"></textarea>
        <i class="material-icons">message</i>
      </div>
      <div class="button-area">
        <button type="submit">Send Message</button>
        <span></span>
      </div>
    </form>
  </div>

  <script src="main.js"></script>

</body>
</html>
Creating a CSS file
Second, create a CSS file with the name of style.css and paste the given codes in your CSS file. Remember, you’ve to create a file with .css extension.
					/* Import Google font - Poppins */
@import url('https://fonts.googleapis.com/css2?family=Poppins:wght@400;500;600&display=swap');
*{
  margin: 0;
  padding: 0;
  box-sizing: border-box;
  font-family: "Poppins", sans-serif;
}
body{
  display: flex;
  padding: 0 10px;
  min-height: 100vh;
  background: linear-gradient(90deg, #2832d4, #7209d4, #00a5b2);
  align-items: center;
  justify-content: center;
}
::selection{
  color: #fff;
  background: #2832d4;
}
.wrapper{
  width: 715px;
  background: #fff;
  border-radius: 5px;
  box-shadow: 10px 10px 10px rgba(0,0,0,0.05);
}
.wrapper header{
  font-size: 22px;
  font-weight: 600;
  padding: 20px 30px;
  border-bottom: 1px solid #2832d4;
  background: linear-gradient(90deg, #2832d4, #7209d4,#00a5b2);
  -webkit-background-clip: text;
  -webkit-text-fill-color: transparent;
}
.wrapper form{
  margin: 35px 30px;
}
.wrapper form.disabled{
  pointer-events: none;
  opacity: 0.7;
}
form .dbl-field{
  display: flex;
  margin-bottom: 25px;
  justify-content: space-between;
}
.dbl-field .field{
  height: 50px;
  display: flex;
  position: relative;
  width: calc(100% / 2 - 13px);
}
.wrapper form i{
  position: absolute;
  top: 50%;
  left: 18px;
  color: #2832d4;
  font-size: 17px;
  pointer-events: none;
  transform: translateY(-50%);
}
form .field input,
form .message textarea{
  width: 100%;
  height: 100%;
  outline: none;
  padding: 0 18px 0 48px;
  font-size: 16px;
  border-radius: 5px;
  border: 1px solid #2832d4;
}
.field input::placeholder,
.message textarea::placeholder{
  color: #2832d4;
}
.field input:focus,
.message textarea:focus{
  padding-left: 47px;
  border: 2px solid #2832d4;
}
.field input:focus ~ i,
.message textarea:focus ~ i{
  color: #2832d4;
}
form .message{
  position: relative;
}
form .message i{
  top: 30px;
  font-size: 20px;
}
form .message textarea{
  min-height: 130px;
  max-height: 230px;
  max-width: 100%;
  min-width: 100%;
  padding: 15px 20px 0 48px;
}
form .message textarea::-webkit-scrollbar{
  width: 0px;
}
.message textarea:focus{
  padding-top: 14px;
}
form .button-area{
  margin: 25px 0;
  display: flex;
  align-items: center;
}
.button-area button{
  color: #fff;
  border: none;
  outline: none;
  font-size: 18px;
  cursor: pointer;
  border-radius: 5px;
  padding: 13px 25px;
  background: linear-gradient(90deg, #2832d4, #7209d4);

}
.button-area button:hover{
  background: #025ce3;
  transition: background 0.3s ease;
}
.button-area span{
  font-size: 17px;
  margin-left: 30px;
  display: none;
}
@media (max-width: 600px){
  .wrapper header{
    text-align: center;
  }
  .wrapper form{
    margin: 35px 20px;
  }
  form .dbl-field{
    flex-direction: column;
    margin-bottom: 0px;
  }
  form .dbl-field .field{
    width: 100%;
    height: 45px;
    margin-bottom: 20px;
  }
  form .message textarea{
    resize: none;
  }
  form .button-area{
    margin-top: 20px;
    flex-direction: column;
  }
  .button-area button{
    width: 100%;
    padding: 11px 0;
    font-size: 16px;
  }
  .button-area span{
    margin: 20px 0 0;
    text-align: center;
  }
}
Creating a JavaScript file
Third, create a JavaScript file with the name of script.js and paste the given codes into your JavaScript file. Remember, you’ve to create a file with .js extension.
					const form = document.querySelector("form"),
statusTxt = form.querySelector(".button-area span");
form.onsubmit = (e)=>{
  e.preventDefault();
  statusTxt.style.color = "#0D6EFD";
  statusTxt.style.display = "block";
  statusTxt.innerText = "Sending your message...";
  form.classList.add("disabled");

  let xhr = new XMLHttpRequest();
  xhr.open("POST", "message.php", true);
  xhr.onload = ()=>{
    if(xhr.readyState == 4 && xhr.status == 200){
      let response = xhr.response;
      if(response.indexOf("required") != -1 || response.indexOf("valid") != -1 || response.indexOf("failed") != -1){
        statusTxt.style.color = "red";
      }else{
        form.reset();
        setTimeout(()=>{
          statusTxt.style.display = "none";
        }, 3000);
      }
      statusTxt.innerText = response;
      form.classList.remove("disabled");
    }
  }
  let formData = new FormData(form);
  xhr.send(formData);
}
Creating a PHP file
Last, create a PHP file with the name of message.php and paste the given codes into your PHP file. You’ve to create a file with .php extension. Remember, after copying and paste these PHP codes, you have to enter that email address in the $receiver variable where you want to receive all messages.
					<?php
  $name = htmlspecialchars($_POST['name']);
  $email = htmlspecialchars($_POST['email']);
  $phone = htmlspecialchars($_POST['phone']);
  $website = htmlspecialchars($_POST['website']);
  $message = htmlspecialchars($_POST['message']);

  if(!empty($email) && !empty($message)){
    if(filter_var($email, FILTER_VALIDATE_EMAIL)){
      $receiver = "receiver_email_address"; //enter that email address where you want to receive all messages
      $subject = "From: $name <$email>";
      $body = "Name: $name\nEmail: $email\nPhone: $phone\nWebsite: $website\n\nMessage:\n$message\n\nRegards,\n$name";
      $sender = "From: $email";
      if(mail($receiver, $subject, $body, $sender)){
         echo "Your message has been sent";
      }else{
         echo "Sorry, failed to send your message!";
      }
    }else{
      echo "Enter a valid email address!";
    }
  }else{
    echo "Email and message field is required!";
  }
?>
That’s all, now you’ve successfully created a Working Contact Form in PHP. If your code doesn’t work or you’ve faced any error/problem, please feel free to contact us.

