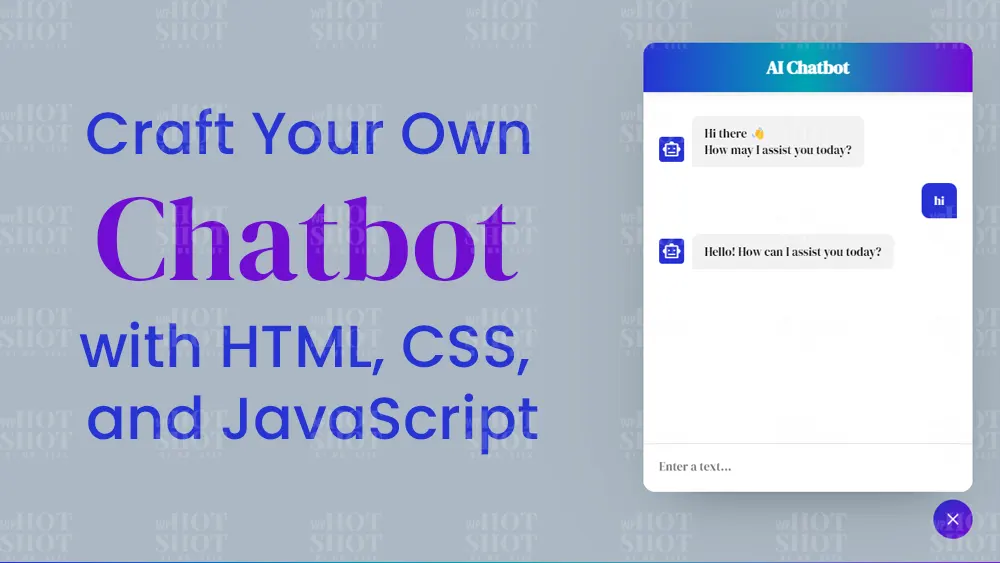
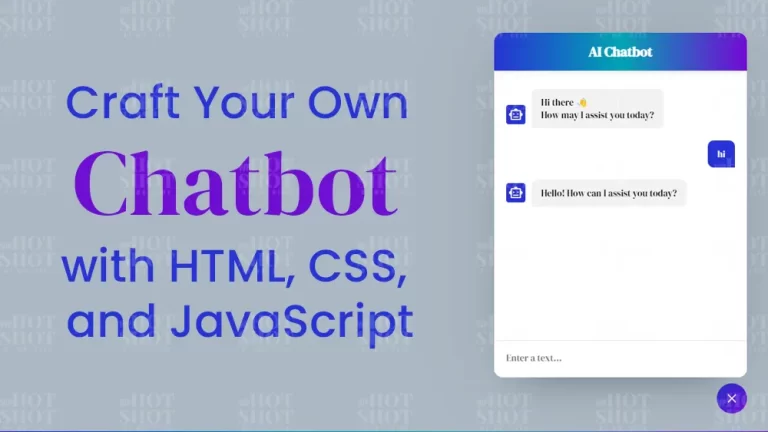
Chatbots have become ubiquitous features on numerous websites, serving as indispensable elements for contemporary online platforms. For those unfamiliar, a chatbot functions as a digital assistant, adept at comprehending user inquiries and delivering pertinent responses.
Constructing a chatbot presents an invaluable opportunity for novice web developers to immerse themselves in HTML, CSS, and JavaScript, fundamental languages pivotal for crafting practical web projects. Hence, within this article, I’ll elucidate the process of crafting a fully functional chatbot using HTML, CSS, and JavaScript from the ground up.
Our chatbot is equipped to handle a myriad of user inquiries, ensuring prompt responses. It boasts a sleek and adaptable user interface, guaranteeing a seamless interaction across various devices. It’s noteworthy that our chatbot leverages the OpenAI API, a cost-free resource, to furnish responses to user queries. It’s only free if your account is newly created or else you will have to spend atleast $5 to make it work.
Video Tutorial of Chatbot
If video tutorials are your preferred learning method, the featured video is a valuable tool to grasp the steps involved in developing your own operational chatbot. Within the video, I dissect each code line and offer insightful commentary, ensuring it’s accessible and straightforward for beginners to comprehend.
Steps To Craft Your Working Chatbot
To craft a functional chatbot of your own with HTML, CSS, and JavaScript, adhere to these simple and easy to follow guidelines:
To get stared create a folder, you can name this folder whatever you want, and inside this folder, create the mentioned files.
HTML
First create an index.html file. The file name must be index with the extension .html. Insert the subsequent HTML snippets into your index.html document: This code excerpt encompasses a chatbot header, an unordered list (ul) for the chatbox, and an input field for user messages. Initially, the chatbot will exhibit a welcome message as the inaugural chat “li”. Later on, we’ll employ JavaScript to dynamically append additional chat “li” elements containing chat specifics.
					<!DOCTYPE html>
<!-- Coding By Mr.Geek - www.WPHotSot.com -->
<html lang="en" dir="ltr">

<head>
  <meta charset="utf-8">
  <title>Chatbot in JavaScript | WPHotSot</title>
  <link rel="stylesheet" href="style.css">
  <meta name="viewport" content="width=device-width, initial-scale=1.0">
  <!-- Google Fonts Link For Icons -->
  <link rel="stylesheet"
    href="https://fonts.googleapis.com/css2?family=Material+Symbols+Outlined:opsz,wght,FILL,GRAD@48,400,0,0" />
  <link rel="stylesheet"
    href="https://fonts.googleapis.com/css2?family=Material+Symbols+Rounded:opsz,wght,FILL,GRAD@48,400,1,0" />
  <script src="script.js" defer></script>
</head>

<body>
  <button class="chatbot-toggler">
    <span class="material-symbols-rounded">mode_comment</span>
    <span class="material-symbols-outlined">close</span>
  </button>
  <div class="chatbot">
    <header>
      <h2>AI Chatbot</h2>
      <span class="close-btn material-symbols-outlined">close</span>
    </header>
    <ul class="chatbox">
      <li class="chat incoming">
        <span class="material-symbols-outlined">smart_toy</span>
        <p>Hi there 👋<br>How may I assist you today?</p>
      </li>
    </ul>
    <div class="chat-input">
      <textarea placeholder="Enter a text..." spellcheck="false" required></textarea>
      <span id="send-btn" class="material-symbols-rounded">send</span>
    </div>
  </div>

</body>

</html>
CSS
Now, create an style.css file. The file name can be anything but extension should be .css. Here i have named it style with the extension .css.
Subsequently, incorporate the subsequent CSS snippets into your style.css document to implement visual enhancements to your chatbot. Upon loading the webpage in your browser, only the chatbot toggle button will be visible at the bottom right corner. You have the flexibility to tailor this code according to your preferences by modifying CSS properties such as color, font, size, and more.
					/* Import Google font - DM Serif Display */
@import url('https://fonts.googleapis.com/css2?family=DM+Serif+Display:ital@0;1&display=swap');

* {
  margin: 0;
  padding: 0;
  box-sizing: border-box;
  font-family: "DM Serif Display", serif;
}

body {
  background: #abb8c3;
}

.chatbot-toggler {
  position: fixed;
  bottom: 30px;
  right: 35px;
  outline: none;
  border: none;
  height: 50px;
  width: 50px;
  display: flex;
  cursor: pointer;
  align-items: center;
  justify-content: center;
  border-radius: 50%;
  background: linear-gradient(45deg, #2832D4, #7209D4);
  transition: all 0.2s ease;
}

body.show-chatbot .chatbot-toggler {
  transform: rotate(90deg);
}

.chatbot-toggler span {
  color: #fff;
  position: absolute;
}

.chatbot-toggler span:last-child,
body.show-chatbot .chatbot-toggler span:first-child {
  opacity: 0;
}

body.show-chatbot .chatbot-toggler span:last-child {
  opacity: 1;
}

.chatbot {
  position: fixed;
  right: 35px;
  bottom: 90px;
  width: 420px;
  background: #fff;
  border-radius: 15px;
  overflow: hidden;
  opacity: 0;
  pointer-events: none;
  transform: scale(0.5);
  transform-origin: bottom right;
  box-shadow: 0 0 128px 0 rgba(0, 0, 0, 0.1),
    0 32px 64px -48px rgba(0, 0, 0, 0.5);
  transition: all 0.1s ease;
}

body.show-chatbot .chatbot {
  opacity: 1;
  pointer-events: auto;
  transform: scale(1);
}

.chatbot header {
  padding: 16px 0;
  position: relative;
  text-align: center;
  color: #fff;
  background: linear-gradient(to right, #2832D4, #00A5B2, #7209D4);
  box-shadow: 0 2px 10px rgba(0, 0, 0, 0.1);
}

.chatbot header span {
  position: absolute;
  right: 15px;
  top: 50%;
  display: none;
  cursor: pointer;
  transform: translateY(-50%);
}

header h2 {
  font-size: 1.4rem;
}

.chatbot .chatbox {
  overflow-y: auto;
  height: 510px;
  padding: 30px 20px 100px;
}

.chatbot :where(.chatbox, textarea)::-webkit-scrollbar {
  width: 6px;
}

.chatbot :where(.chatbox, textarea)::-webkit-scrollbar-track {
  background: #fff;
  border-radius: 25px;
}

.chatbot :where(.chatbox, textarea)::-webkit-scrollbar-thumb {
  background: #ccc;
  border-radius: 25px;
}

.chatbox .chat {
  display: flex;
  list-style: none;
}

.chatbox .outgoing {
  margin: 20px 0;
  justify-content: flex-end;
}

.chatbox .incoming span {
  width: 32px;
  height: 32px;
  color: #fff;
  cursor: default;
  text-align: center;
  line-height: 32px;
  align-self: flex-end;
  background: #2832D4;
  border-radius: 4px;
  margin: 0 10px 7px 0;
}

.chatbox .chat p {
  white-space: pre-wrap;
  padding: 12px 16px;
  border-radius: 10px 10px 0 10px;
  max-width: 75%;
  color: #fff;
  font-size: 0.95rem;
  background: #2832D4;
}

.chatbox .incoming p {
  border-radius: 10px 10px 10px 0;
}

.chatbox .chat p.error {
  color: #721c24;
  background: #f8d7da;
}

.chatbox .incoming p {
  color: #000;
  background: #f2f2f2;
}

.chatbot .chat-input {
  display: flex;
  gap: 5px;
  position: absolute;
  bottom: 0;
  width: 100%;
  background: #fff;
  padding: 3px 20px;
  border-top: 1px solid #ddd;
}

.chat-input textarea {
  height: 55px;
  width: 100%;
  border: none;
  outline: none;
  resize: none;
  max-height: 180px;
  padding: 15px 15px 15px 0;
  font-size: 0.95rem;
}

.chat-input span {
  align-self: flex-end;
  color: #2832D4;
  cursor: pointer;
  height: 55px;
  display: flex;
  align-items: center;
  visibility: hidden;
  font-size: 1.35rem;
}

.chat-input textarea:valid~span {
  visibility: visible;
}

@media (max-width: 490px) {
  .chatbot-toggler {
    right: 20px;
    bottom: 20px;
  }

  .chatbot {
    right: 0;
    bottom: 0;
    height: 100%;
    border-radius: 0;
    width: 100%;
  }

  .chatbot .chatbox {
    height: 90%;
    padding: 25px 15px 100px;
  }

  .chatbot .chat-input {
    padding: 5px 15px;
  }

  .chatbot header span {
    display: block;
  }
}
JavaScript
Lastly, establish a script.js file. Ensure the filename is “script” with the extension “.js“. Insert the ensuing JavaScript code into your script.js document: This script will render your chatbot operational, enabling you to pose questions, toggle the chatbot’s visibility by clicking the toggle button at the bottom right, and perform other functionalities.
					const chatbotToggler = document.querySelector(".chatbot-toggler");
const closeBtn = document.querySelector(".close-btn");
const chatbox = document.querySelector(".chatbox");
const chatInput = document.querySelector(".chat-input textarea");
const sendChatBtn = document.querySelector(".chat-input span");

let userMessage = null; // Variable to store user's message
const API_KEY = " "; // Paste your API key here
const inputInitHeight = chatInput.scrollHeight;

const createChatLi = (message, className) => {
  // Create a chat <li> element with passed message and className
  const chatLi = document.createElement("li");
  chatLi.classList.add("chat", `${className}`);
  let chatContent = className === "outgoing" ? `<p></p>` : `<span class="material-symbols-outlined">smart_toy</span><p></p>`;
  chatLi.innerHTML = chatContent;
  chatLi.querySelector("p").textContent = message;
  return chatLi; // return chat <li> element
}

const generateResponse = (chatElement) => {
  const API_URL = "https://api.openai.com/v1/chat/completions";
  const messageElement = chatElement.querySelector("p");

  // Define the properties and message for the API request
  const requestOptions = {
    method: "POST",
    headers: {
      "Content-Type": "application/json",
      "Authorization": `Bearer ${API_KEY}`
    },
    body: JSON.stringify({
      model: "gpt-3.5-turbo",
      messages: [{ role: "user", content: userMessage }],
    })
  }

  // Send POST request to API, get response and set the reponse as paragraph text
  fetch(API_URL, requestOptions).then(res => res.json()).then(data => {
    messageElement.textContent = data.choices[0].message.content.trim();
  }).catch(() => {
    messageElement.classList.add("error");
    messageElement.textContent = "Oops! Something went wrong. Please try again.";
  }).finally(() => chatbox.scrollTo(0, chatbox.scrollHeight));
}

const handleChat = () => {
  userMessage = chatInput.value.trim(); // Get user entered message and remove extra whitespace
  if (!userMessage) return;

  // Clear the input textarea and set its height to default
  chatInput.value = "";
  chatInput.style.height = `${inputInitHeight}px`;

  // Append the user's message to the chatbox
  chatbox.appendChild(createChatLi(userMessage, "outgoing"));
  chatbox.scrollTo(0, chatbox.scrollHeight);

  setTimeout(() => {
    // Display "Thinking..." message while waiting for the response
    const incomingChatLi = createChatLi("...", "incoming");
    chatbox.appendChild(incomingChatLi);
    chatbox.scrollTo(0, chatbox.scrollHeight);
    generateResponse(incomingChatLi);
  }, 600);
}

chatInput.addEventListener("input", () => {
  // Adjust the height of the input textarea based on its content
  chatInput.style.height = `${inputInitHeight}px`;
  chatInput.style.height = `${chatInput.scrollHeight}px`;
});

chatInput.addEventListener("keydown", (e) => {
  // If Enter key is pressed without Shift key and the window
  // width is greater than 800px, handle the chat
  if (e.key === "Enter" && !e.shiftKey && window.innerWidth > 800) {
    e.preventDefault();
    handleChat();
  }
});

sendChatBtn.addEventListener("click", handleChat);
closeBtn.addEventListener("click", () => document.body.classList.remove("show-chatbot"));
chatbotToggler.addEventListener("click", () => document.body.classList.toggle("show-chatbot"));
Kindly be aware that your chatbot presently lacks the capability to fetch responses for your queries, as you haven’t specified your API key in the AP_KEY variable. To acquire a complimentary API key from OpenAI, register for an account at https://platform.openai.com/account/api-keys.
“Keep in mind that upon registering with OpenAI, you’ll receive a complimentary $5 credit for your API utilization. If your account exceeds 3 months in age or depletes the credit, you’ll require a premium subscription or establish a fresh account with a different number to continue utilizing the API. Details regarding your API usage and expiration date are accessible on the account’s usage page.”
The code presented above follows a straightforward sequence. Initially, it showcases the user’s message in the chatbox and employs the OpenAI API to produce a suitable response. During the wait for the API response, three dots (…) will be displayed. Upon receiving the response, it substitutes this placeholder in the chat response.
Demo:
Conclusion
In summary, crafting a functional chatbot provides a tangible application for your skill set. I trust that by adhering to the steps outlined in this guide, you’ve successfully developed your own chatbot using HTML, CSS, and JavaScript.
To further enhance your proficiency in web development, consider undertaking the ChatGPT Clone Project using HTML, CSS, and JavaScript. This endeavor offers an opportunity to broaden your expertise by creating a ChatGPT replica featuring additional functionalities like dark/light themes and saved chats utilizing local storage.
Should you encounter any challenges during the creation process or encounter unexpected issues with your code, feel free to access the source code files for this chatbot project at no cost by clicking the Download button. Upon downloading the files, remember to insert an “OpenAI API key” into the API_KEY variable within the script.js file.

