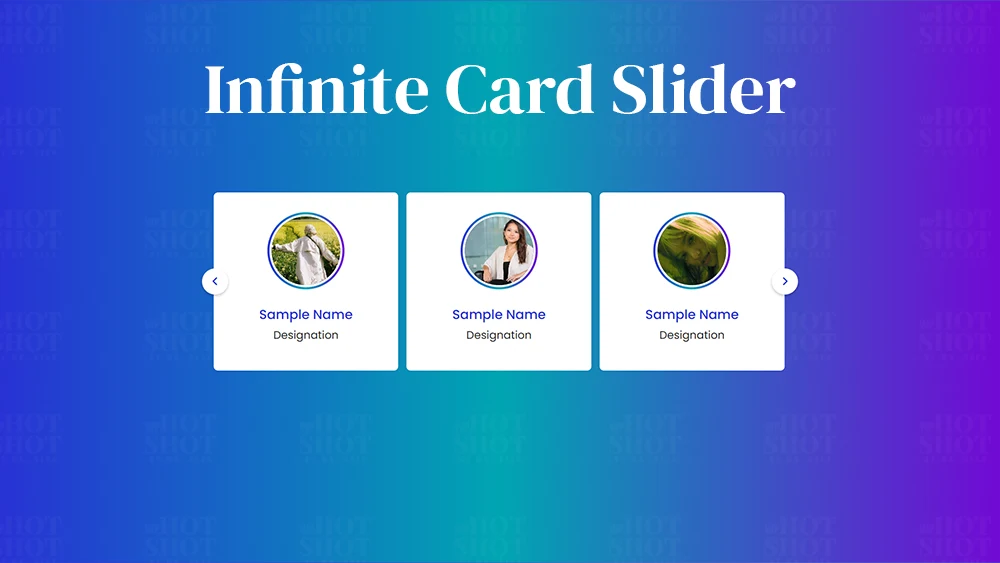
A card slider is a popular design element used on many modern websites to showcase products, services, or images. It allows users to view multiple items in a visually appealing and interactive way. An infinite card slider, on the other hand, is a slider that continuously loops through the items without stopping at the end. In this article, we will guide you on how to create an infinite card slider using HTML, CSS, and JavaScript.
Step 1: Create the HTML Markup
The first step is to create the HTML markup for the card slider. You can use the div tag with a unique class or ID to group the items to be displayed. Each item can be represented by a div with its unique class or ID. You can add images, text, or any other content inside each item div.
					<!DOCTYPE html>
<!-- By Mr. Geek - www.wphotshot.com -->
<html lang="en" dir="ltr">
  <head>
    <meta charset="utf-8">
    <title>Infinite Card Slider JavaScript | WPHotshot</title>
    <link rel="stylesheet" href="style.css">
    <meta name="viewport" content="width=device-width, initial-scale=1.0">
    <!-- Fontawesome Link for Icons -->
    <link rel="stylesheet" href="https://cdnjs.cloudflare.com/ajax/libs/font-awesome/6.3.0/css/all.min.css">
    <script src="main.js" defer></script>
  </head>
  <body>
    <div class="wrapper">
      <i id="left" class="fa-solid fa-angle-left"></i>
      <ul class="carousel">
        <li class="card">
          <div class="img"><img decoding="async" src="img/1.jpg" alt="img" draggable="false"></div>
          <h2>Sample Name</h2>
          <span>Designation</span>
        </li>
        <li class="card">
          <div class="img"><img decoding="async" src="img/2.jpg" alt="img" draggable="false"></div>
          <h2>Sample Name</h2>
          <span>Designation</span>
        </li>
        <li class="card">
          <div class="img"><img decoding="async" src="img/3.jpg" alt="img" draggable="false"></div>
          <h2>Sample Name</h2>
          <span>Designation</span>
        </li>
        <li class="card">
          <div class="img"><img decoding="async" src="img/4.jpg" alt="img" draggable="false"></div>
          <h2>Sample Name</h2>
          <span>Designation</span>
        </li>
        <li class="card">
          <div class="img"><img decoding="async" src="img/5.jpg" alt="img" draggable="false"></div>
          <h2>Sample Name</h2>
          <span>Designation</span>
        </li>
        <li class="card">
          <div class="img"><img decoding="async" src="img/6.jpg" alt="img" draggable="false"></div>
          <h2>Sample Name</h2>
          <span>Designation</span>
        </li>
      </ul>
      <i id="right" class="fa-solid fa-angle-right"></i>
    </div>

  </body>
</html>
Step 2: Add CSS Styling
Next, you can add CSS styling to the card slider to make it visually appealing. You can customize the appearance of each item, such as its size, position, background color, and border. You can also use CSS animations and transitions to create smooth and engaging transitions between the items.
					/* Import Google font - Poppins */
@import url('https://fonts.googleapis.com/css2?family=Poppins:wght@400;500;600&display=swap');
* {
  margin: 0;
  padding: 0;
  box-sizing: border-box;
  font-family: "Poppins", sans-serif;
}
body {
  display: flex;
  padding: 0 35px;
  align-items: center;
  justify-content: center;
  min-height: 100vh;
  background: linear-gradient(to right, #2832d4, #00A5B2, #7209D4);
}
.wrapper {
  max-width: 1100px;
  width: 100%;
  position: relative;
}
.wrapper i {
  top: 50%;
  height: 50px;
  width: 50px;
  cursor: pointer;
  font-size: 1.25rem;
  position: absolute;
  text-align: center;
  line-height: 50px;
  background: #fff;
  border-radius: 50%;
  box-shadow: 0 3px 6px rgba(0,0,0,0.23);
  transform: translateY(-50%);
  transition: transform 0.1s linear;
}
.wrapper i:active{
  transform: translateY(-50%) scale(0.85);
}
.wrapper i:first-child{
  left: -22px;
}
.wrapper i:last-child{
  right: -22px;
}
.wrapper .carousel{
  display: grid;
  grid-auto-flow: column;
  grid-auto-columns: calc((100% / 3) - 12px);
  overflow-x: auto;
  scroll-snap-type: x mandatory;
  gap: 16px;
  border-radius: 8px;
  scroll-behavior: smooth;
  scrollbar-width: none;
}
.carousel::-webkit-scrollbar {
  display: none;
}
.carousel.no-transition {
  scroll-behavior: auto;
}
.carousel.dragging {
  scroll-snap-type: none;
  scroll-behavior: auto;
}
.carousel.dragging .card {
  cursor: grab;
  user-select: none;
}
.carousel :where(.card, .img) {
  display: flex;
  justify-content: center;
  align-items: center;
}
.carousel .card {
  scroll-snap-align: start;
  height: 342px;
  list-style: none;
  background: #fff;
  cursor: pointer;
  padding-bottom: 15px;
  flex-direction: column;
  border-radius: 8px;
}
.carousel .card .img {
  background: linear-gradient(to right, #2832d4, #00A5B2, #7209D4);
  height: 148px;
  width: 148px;
  border-radius: 50%;
}
.card .img img {
  width: 140px;
  height: 140px;
  border-radius: 50%;
  object-fit: cover;
  border: 4px solid #fff;
}
.carousel .card h2 {
  font-weight: 500;
  font-size: 1.56rem;
  margin: 30px 0 5px;
}
.carousel .card span {
  color: #212121;
  font-size: 1.31rem;
}

@media screen and (max-width: 900px) {
  .wrapper .carousel {
    grid-auto-columns: calc((100% / 2) - 9px);
  }
}

@media screen and (max-width: 600px) {
  .wrapper .carousel {
    grid-auto-columns: 100%;
  }
}

.fa-solid{
  color: #2832d4;
}

h2{
  color: #2832d4;
}
Step 3: Implement JavaScript Slider Logic
The most crucial step in creating an infinite card slider is implementing the JavaScript slider logic. You can use JavaScript to create a function that will continuously loop through the items. You can do this by adding an event listener that triggers when the slider reaches the last item and resets it to the first item.
					const wrapper = document.querySelector(".wrapper");
const carousel = document.querySelector(".carousel");
const firstCardWidth = carousel.querySelector(".card").offsetWidth;
const arrowBtns = document.querySelectorAll(".wrapper i");
const carouselChildrens = [...carousel.children];

let isDragging = false, isAutoPlay = true, startX, startScrollLeft, timeoutId;

// Get the number of cards that can fit in the carousel at once
let cardPerView = Math.round(carousel.offsetWidth / firstCardWidth);

// Insert copies of the last few cards to beginning of carousel for infinite scrolling
carouselChildrens.slice(-cardPerView).reverse().forEach(card => {
    carousel.insertAdjacentHTML("afterbegin", card.outerHTML);
});

// Insert copies of the first few cards to end of carousel for infinite scrolling
carouselChildrens.slice(0, cardPerView).forEach(card => {
    carousel.insertAdjacentHTML("beforeend", card.outerHTML);
});

// Scroll the carousel at appropriate postition to hide first few duplicate cards on Firefox
carousel.classList.add("no-transition");
carousel.scrollLeft = carousel.offsetWidth;
carousel.classList.remove("no-transition");

// Add event listeners for the arrow buttons to scroll the carousel left and right
arrowBtns.forEach(btn => {
    btn.addEventListener("click", () => {
        carousel.scrollLeft += btn.id == "left" ? -firstCardWidth : firstCardWidth;
    });
});

const dragStart = (e) => {
    isDragging = true;
    carousel.classList.add("dragging");
    // Records the initial cursor and scroll position of the carousel
    startX = e.pageX;
    startScrollLeft = carousel.scrollLeft;
}

const dragging = (e) => {
    if(!isDragging) return; // if isDragging is false return from here
    // Updates the scroll position of the carousel based on the cursor movement
    carousel.scrollLeft = startScrollLeft - (e.pageX - startX);
}

const dragStop = () => {
    isDragging = false;
    carousel.classList.remove("dragging");
}

const infiniteScroll = () => {
    // If the carousel is at the beginning, scroll to the end
    if(carousel.scrollLeft === 0) {
        carousel.classList.add("no-transition");
        carousel.scrollLeft = carousel.scrollWidth - (2 * carousel.offsetWidth);
        carousel.classList.remove("no-transition");
    }
    // If the carousel is at the end, scroll to the beginning
    else if(Math.ceil(carousel.scrollLeft) === carousel.scrollWidth - carousel.offsetWidth) {
        carousel.classList.add("no-transition");
        carousel.scrollLeft = carousel.offsetWidth;
        carousel.classList.remove("no-transition");
    }

    // Clear existing timeout & start autoplay if mouse is not hovering over carousel
    clearTimeout(timeoutId);
    if(!wrapper.matches(":hover")) autoPlay();
}

const autoPlay = () => {
    if(window.innerWidth < 800 || !isAutoPlay) return; // Return if window is smaller than 800 or isAutoPlay is false
    // Autoplay the carousel after every 2500 ms
    timeoutId = setTimeout(() => carousel.scrollLeft += firstCardWidth, 2500);
}
autoPlay();

carousel.addEventListener("mousedown", dragStart);
carousel.addEventListener("mousemove", dragging);
document.addEventListener("mouseup", dragStop);
carousel.addEventListener("scroll", infiniteScroll);
wrapper.addEventListener("mouseenter", () => clearTimeout(timeoutId));
wrapper.addEventListener("mouseleave", autoPlay);
Conclusion
In conclusion, an infinite card slider is a powerful design element that can make your website more engaging and interactive. By following the steps above, you can create an infinite card slider using HTML, CSS, and JavaScript that will showcase your products or services in a visually appealing and interactive way. Remember to test your code thoroughly to ensure that it works as intended. Implementing an infinite card slider on your website can improve user engagement and ultimately lead to higher conversion rates.

