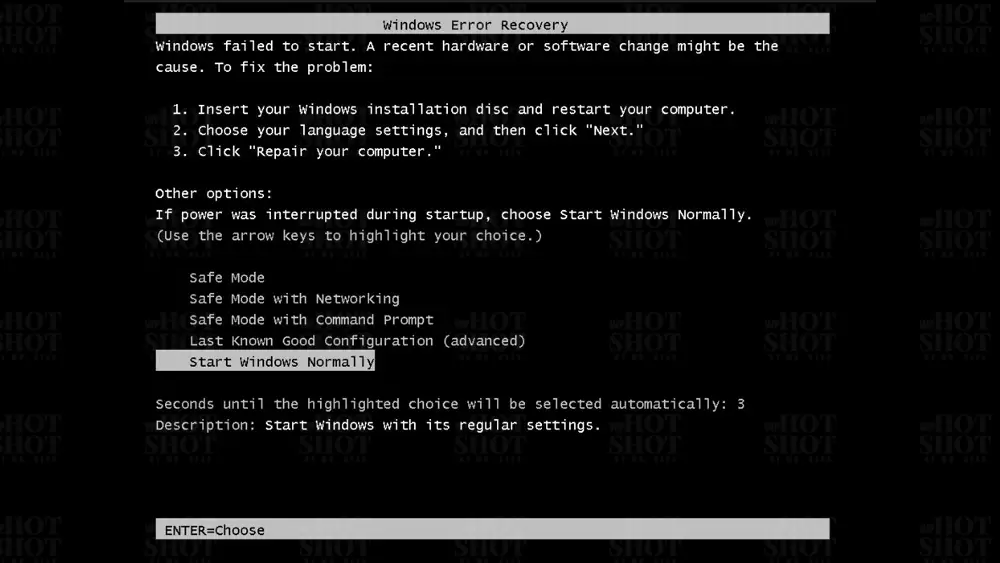
As a Windows user, one of the most frustrating things that can happen is encountering a boot error. It can be a real headache, especially when you’re in a hurry and need to get your computer up and running. Fortunately, there are several solutions to fix Windows boot errors, and we’re here to guide you through them step-by-step. In this article, we’ll cover the most common boot errors and provide solutions to fix them.
What Causes Windows Boot Errors?
A Windows boot error can be caused by a variety of issues, including hardware problems, software conflicts, and corrupted system files. In some cases, it can be difficult to pinpoint the exact cause of the error. However, there are a few common culprits that we can look out for.
One of the most common causes of boot errors is a corrupted or damaged boot configuration file (BCD). The BCD is responsible for loading the operating system, and if it’s corrupted, your computer won’t be able to boot up properly. Other possible causes of boot errors include a faulty hard drive, a damaged operating system, or a virus or malware infection.
Solutions to Fix Windows Boot Errors
1. Use Startup Repair
One of the first things you should try when encountering a boot error is to use the built-in Startup Repair tool in Windows. This tool is designed to scan your system for issues and repair any problems that it finds.
To use Startup Repair, follow these steps:
Boot your computer using a Windows installation disc or USB drive.
Select your language preferences and click Next.
Click Repair your computer.
Select Troubleshoot, then Advanced options, and then Startup Repair.
Follow the on-screen instructions to complete the repair process.
2. Rebuild the BCD
If your computer is unable to boot because of a corrupted BCD, you can rebuild it using the Command Prompt. This process involves running a series of commands to recreate the BCD from scratch.
To rebuild the BCD, follow these steps:
- Boot your computer using a Windows installation disc or USB drive.
- Select your language preferences and click Next.
- Click Repair your computer.
- Select Troubleshoot, then Advanced options, and then Command Prompt.
- Type the following commands in order, pressing Enter after each one:
					bootrec /fixmbr
bootrec /rebuildbcd
bootrec /fixboot
After running these commands, restart your computer and see if the issue is resolved.
3. Check for Hard Drive Errors
If your computer is unable to boot due to a faulty hard drive, you’ll need to perform some diagnostic tests to identify the problem. Windows has a built-in tool called Check Disk (CHKDSK) that can scan your hard drive for errors and attempt to fix them.
To run Check Disk, follow these steps:
- Boot your computer using a Windows installation disc or USB drive.
- Select your language preferences and click Next.
- Click Repair your computer.
- Select Troubleshoot, then Advanced options, and then Command Prompt.
- Type the following command and press Enter:
chkdsk /f /r
- Wait for the scan to complete, then restart your computer and see if the issue is resolved.
4. Perform a System Restore
If your computer was working fine before and suddenly stopped booting up properly, a system restore might help. This process involves rolling back your computer to a previous state when it was working correctly.
To perform a system restore, follow these steps:
Open the System Restore tool:
- Press the Windows key + R on your keyboard to open the Run dialog box.
- Type “rstrui” in the Run box and click OK to open the System Restore tool.
Choose a restore point:
- In the System Restore window, you’ll see a list of available restore points. These are points in time when Windows automatically created a restore point before an update or system change.
- Choose the most recent restore point before the issue occurred. You can also select a specific restore point from the list.
Start the system restore process:
- Click Next to proceed with the selected restore point.
- Confirm the restore point and click Finish to start the system restore process.
- You may be prompted to save any unsaved work, as the computer will restart during the process.
Wait for the system restore process to complete:
- The system restore process can take several minutes to complete. Your computer will restart and may go through a few restart cycles before the process is finished.
- Once the process is complete, your computer should be restored to the selected restore point.
It’s worth noting that system restore will not affect personal files, such as documents or photos. However, it may affect any installed programs or system settings that were made after the selected restore point. Additionally, system restore may not always fix the underlying issue, so it’s best to use it in combination with other troubleshooting steps to fix the issue.
Find more articles regarding Windows Tutorials here.