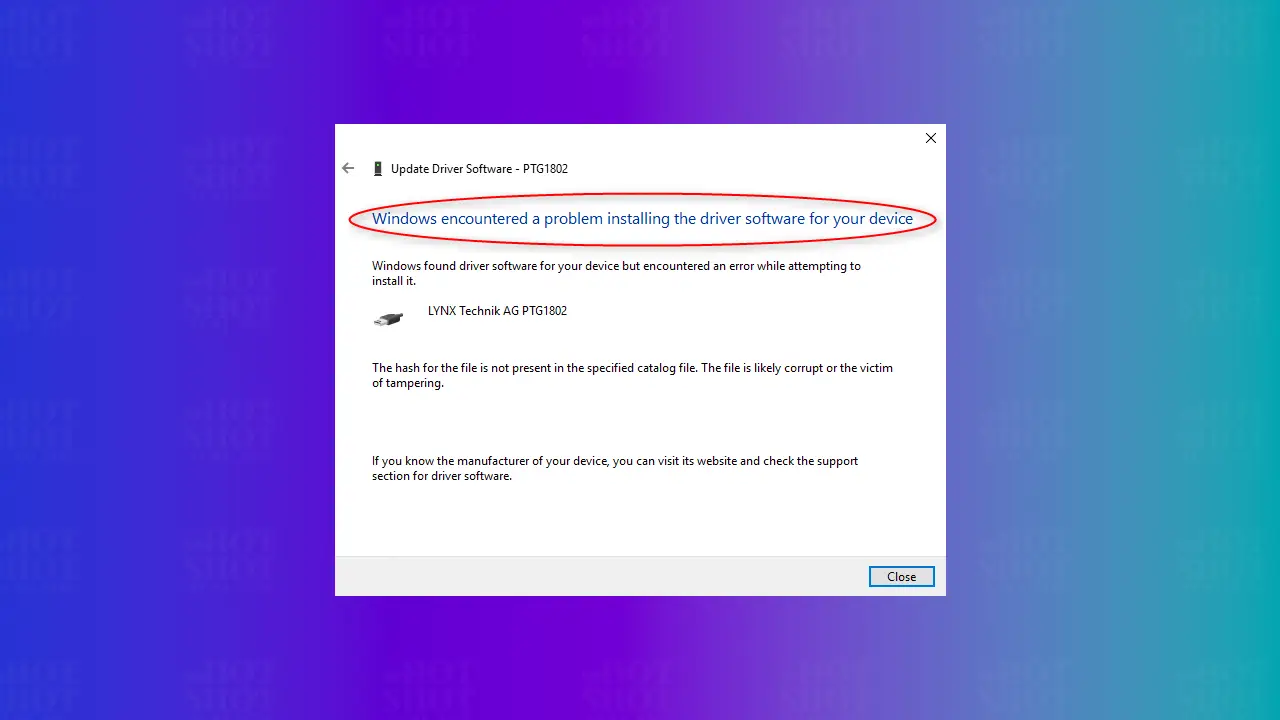
Hash for the File not Present – Windows encountered a problem installing the driver software for your device. Windows found driver software for your device but encountered an error while attempting to install it.
The hash for the file is not present in the specified catalog file. The file is likely corrupt or the victim of tampering.
To Solve This Problem, I Had To Disable Device Driver Signing. Here’s How It’s Done In Windows 10.
Option 1 – Command To Enable Or Disable
- Click the “Start” button.
- Type “command“.
- Right-click on “Command Prompt” and select “Run As Administrator“.
- Do one of the following:
- To disable device driver signing, type “BCDEDIT /set nointegritychecks ON” then press “Enter“
- To enable device driver signing, type “BCDEDIT /set nointegritychecks OFF” then press “Enter“
- You’re done! The Device Driver setting is now modified.
- If above solution doesn’t work, try out the below one. that will definitely work.
Option 2 – Disable From Menus
I figured this was security that was built into Windows to prevent me from installing bad drivers. This is a feature called Device Driver Signing. After going through the steps to disable driver signing in Windows 8, I was able to get my community drivers installed. Here’s how I did it.
- Select the “Start” button.
- Type “startup”.
- Select “Change advanced startup settings“.
- Select “Restart now” under the “Advanced startup” area.
- Select “Troubleshoot“.
- Select “Advanced Options“.
- Select “Startup Options“.
- Select “Restart“.
- A menu will appear where you can press “7” on your keyboard to choose “Disable driver signing enforcement“.
Now Device Driver Signing should be disabled, allowing you to install any driver you like in Windows 10 until you reboot.
What do I do if I get an error that says “An error has occurred setting the element data. The value is protected by Secure Boot policy and cannot be modified or deleted.”?
You will need disable “Secure Boot” in the BIOS settings. Each computer has different steps for entering the BIOS settings. Check the documentation for your system for instructions that pertain to your computer. Usually, you are prompted to enter Setup or BIOS when your computer is starting. It usually requires you to press a certain key at a certain point during the boot process. Once in the BIOS, you should be able find a setting that says “Secure Boot”, and set it to “Disabled”. Be sure to save the settings before exiting.